 +86 17753100577
 manager@beflooring.com


Is There a Way to Reseal Laminate Flooring? — 3 Proven Methods for 2025
September 5, 2025
Abstract
This article examines the question of whether it is possible to reseal laminate flooring. It establishes that laminate flooring is manufactured with a durable, non-porous aluminum oxide wear layer that is not designed to be coated or resealed with aftermarket products like polyurethane. Applying such sealants often results in poor adhesion, flaking, aesthetic degradation, and the voiding of manufacturer warranties. The inquiry then pivots from the impracticality of top-coating to more effective strategies for protecting laminate floors from moisture and wear. The document outlines three primary methods for enhancing the longevity and water resistance of laminate flooring: the precise application of specialized seam sealers to protect the vulnerable joints between planks, the foundational importance of installing a proper moisture barrier and underlayment, and a proactive maintenance regimen that includes correct cleaning protocols and targeted repair techniques. It presents these methods as the appropriate and effective alternative to the misguided attempt to reseal the entire surface, providing a comprehensive guide for homeowners and professionals seeking to preserve their flooring investment.
Key Takeaways
- Laminate’s factory wear layer is non-porous and should not be top-coated.
- Focus on sealing the seams between planks, not the surface, to block moisture.
- A quality underlayment with a vapor barrier is your best defense from subfloor moisture.
- Proper cleaning and immediate spill management prevent most water-related damage.
- Attempting to reseal laminate flooring with polyurethane will likely cause damage and void your warranty.
- Consider upgrading to waterproof laminate for moisture-prone areas.
- Use specialized repair kits for scratches instead of trying to reseal the surface.
Table of Contents
- A Question of Layers: Deconstructing Laminate Flooring to Understand Its Limits
- Comparing Protective Measures: Top-Coat Sealants vs. Inter-Plank Seam Sealers
- Method 1: Fortifying the Seams, the True Gateway for Moisture
- Method 2: The Unseen Guardian Below – Mastering Underlayment and Vapor Barriers
- Method 3: The Art of Proactive Care and Strategic Repair
- The Inevitable Consequences: Why Attempts to Reseal Laminate Flooring Fail
- The Modern Alternative: Embracing Truly Waterproof Laminate Flooring
- Frequently Asked Questions (FAQ)
- A Final Reflection on Preservation
- References
A Question of Layers: Deconstructing Laminate Flooring to Understand Its Limits
The question of whether one can reseal laminate flooring arises from a very human and understandable place: the desire to protect an investment and restore the beauty of a surface that graces our daily lives. We see a scratch, a dull spot, or we worry about a spill in the kitchen, and our minds turn to solutions we know from other contexts, like sealing a wooden deck or varnishing a piece of furniture. It feels intuitive. Yet, to truly grasp the answer, we must not start with the sealant, but with the laminate itself. We must become, for a moment, like geologists examining the strata of the earth, for a laminate plank is a composite, a layered creation of modern engineering.
Imagine a single plank in your hands. It feels solid, but it is not a monolithic piece of wood. It is a carefully constructed sandwich of four distinct layers, each with a specific purpose. Understanding this anatomy is not merely academic; it is the key to understanding why the very concept of “resealing” is often a misapplication of logic, a solution that tragically misunderstands the problem it seeks to solve.
The Four-Layered Architecture of Laminate
At the very bottom lies the backing layer. This is the plank’s foundation, designed to provide stability and, crucially, a degree of moisture resistance from below. It braces the plank, preventing it from warping or bowing. Think of it as the foundation of a house; its integrity is paramount for everything built upon it.
Above this rests the core layer. This is the heart of the plank, its substance and strength. Traditionally, this has been made from High-Density Fiberboard (HDF), which is essentially wood fibers compressed under extreme heat and pressure with resins. The density of this core is a direct indicator of the floor’s quality, its resistance to impact, and, importantly, its stability. However, HDF, being a wood-based product, has an inherent vulnerability: it can swell and deform if exposed to significant amounts of moisture for a prolonged period. This fact is central to our entire discussion. It is the core we are ultimately trying to protect.
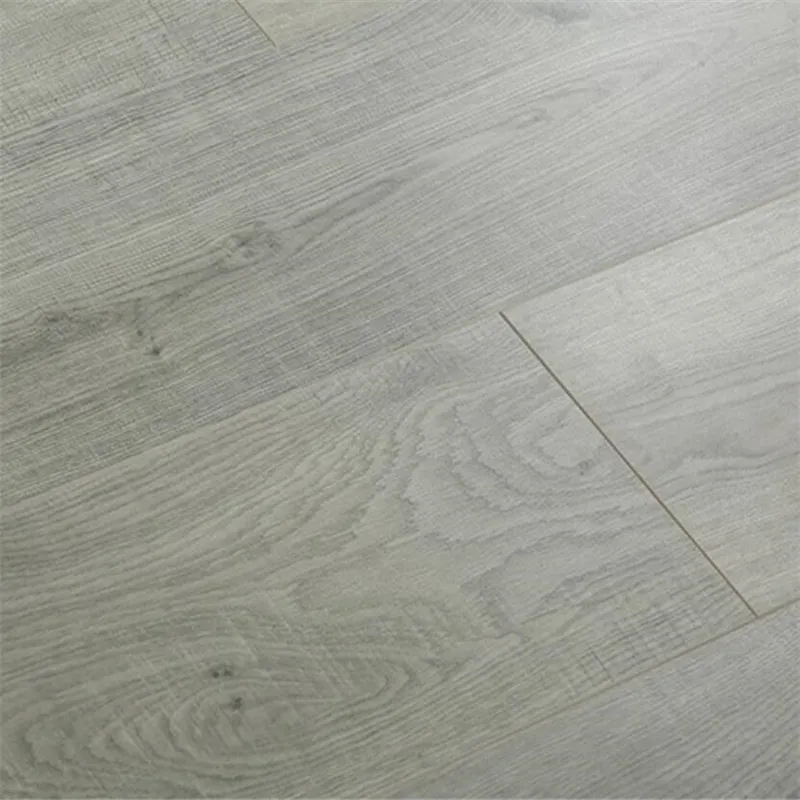
Next comes the image layer, or decorative layer. This is what you see and what you love about your floor. It is a highly detailed, high-resolution photograph of wood grain, stone, or ceramic tile. The realism achieved in modern laminate flooring is a testament to advanced printing technology. This layer gives the floor its character and aesthetic appeal, but it is, in essence, a picture printed on paper. On its own, it has no durability. It is beautiful but fragile, like a photograph in an album.
Finally, we arrive at the most critical layer for our inquiry: the wear layer. This is the transparent, topmost layer that protects the image layer and bears the brunt of daily life—foot traffic, dropped keys, sliding chairs, and spills. It is not a liquid sealant applied at the end; it is a sheet of material fused to the layers below it through immense heat and pressure in a factory setting. This wear layer is typically infused with aluminum oxide, one of the hardest mineral compounds in existence, second only to diamond. This is what gives laminate its famed scratch resistance and durability. The key insight here is that this factory-fused layer is non-porous. It is a sealed, impenetrable shield. It is not designed to absorb anything, and that includes aftermarket sealants.
The Wear Layer: A Fortress, Not a Sponge
Let us pause and consider the implications of this. The wear layer is not like the surface of raw wood, which is porous and readily accepts stains, oils, and sealants. Applying polyurethane to a piece of sanded pine is effective because the liquid penetrates the wood fibers and cures, forming a bond within the material itself.
The laminate wear layer offers no such purchase. It is a smooth, crystalline, and chemically inert surface. When you pour a liquid sealant like polyurethane over it, the sealant has nothing to grip onto. It cannot penetrate. It simply sits on top, like water on a waxed car hood. Initially, it might look shiny and new, but it has formed no meaningful chemical or physical bond. As it cures, it becomes a distinct, separate film lying on the surface. Over time, with the micro-movements of the floor and the abrasion of daily use, this film will inevitably begin to peel, flake, cloud up, or yellow. Instead of a restored floor, you are left with a far greater problem: a peeling, unsightly mess that is nearly impossible to remove without damaging the original wear layer beneath.
Furthermore, these sealants can react unpredictably with the chemical composition of the wear layer, potentially causing discoloration. They also tend to attract dirt and scuffs in a way the original surface does not, making the floor look perpetually grimy. The smooth, easy-to-clean nature of your original laminate is lost, replaced by a sticky, high-maintenance surface. This is the fundamental reason why flooring manufacturers almost universally state that applying a sealant will void the product warranty. You are, in effect, performing a procedure on the material that goes against its very nature. The question, therefore, shifts from “how do I reseal the surface?” to “how do I protect the vulnerable parts of the system?”
Comparing Protective Measures: Top-Coat Sealants vs. Inter-Plank Seam Sealers
To clarify the path forward, it is useful to draw a sharp distinction between the two types of products often conflated in this discussion: general-purpose floor sealants (top-coats) and specialized laminate seam sealers. Their intended functions, chemical compositions, and results are worlds apart. Understanding this difference is the first step away from a costly mistake and toward an effective solution.
| Feature | Surface Sealant (e.g., Polyurethane) | Laminate Seam Sealer |
|---|---|---|
| Application Area | Entire floor surface, covering the top of the planks. | Only in the tiny gaps and joints between planks. |
| Primary Goal | To create a new, continuous protective film over the floor. | To create a flexible, waterproof gasket within the seams. |
| Bonding Mechanism | Attempts to adhere to the non-porous wear layer (and fails). | Adheres to the exposed, more porous core material inside the joint. |
| Flexibility | Cures into a hard, rigid film. | Remains flexible to accommodate plank movement. |
| Visual Effect | Alters the original finish, often adding a plastic-like gloss. Can yellow. | Is invisible when applied correctly and excess is removed. |
| Long-Term Result | Peeling, flaking, clouding, and irreversible damage. | Prevents moisture from seeping into the core, stopping swelling. |
| Warranty Impact | Voids manufacturer warranty. | Generally accepted and even recommended by some installers. |
This comparison illuminates the core principle: you must work with the design of the flooring, not against it. The problem with laminate is not the top surface; that part is already sealed. The problem is the seams. A seam sealer is a targeted, surgical solution, whereas a top-coat is a blunt instrument that causes more harm than good.
Method 1: Fortifying the Seams, the True Gateway for Moisture
Having established that the wear layer is a fortress, we must now turn our attention to the castle’s gates: the seams. The click-lock mechanism of modern laminate flooring creates a very tight fit, but it is not, by its nature, hermetically sealed. Tiny, microscopic gaps remain between the planks. When a glass of water is spilled, or a wet pet walks across the floor, the liquid does not penetrate the top of the plank. It sits there, and if left unattended, gravity and capillary action will draw it into these seams.
Once inside the seam, the water comes into direct contact with the exposed edges of the HDF core. As we discussed, this wood-fiber core is thirsty. It will absorb the moisture, and like any wood product, it will swell. This swelling manifests as “peaking,” where the edges of the planks rise up, creating a noticeable ridge. This damage is often irreversible. The floor’s smooth, uniform appearance is destroyed, and the structural integrity of the planks is compromised.
Therefore, the most effective way to “reseal” your laminate floor is to seal the part that actually needs it. This is our first, and perhaps most important, proven method.
Identifying the Enemy: Moisture Infiltration at the Joints
Before you can fight an enemy, you must know it. The enemy of your laminate floor is not foot traffic; it is standing liquid. Think about the high-risk areas in your home: the kitchen sink, the area around the dishwasher, the entryway where wet shoes are left, the floor around pet water bowls. These are the zones where seam protection is not just a good idea, but a necessity for long-term survival.
A simple mental exercise can be helpful here. Picture your entire laminate floor as a single, continuous sheet. Now, imagine taking a pair of scissors and cutting a grid across that sheet, representing the seams. That is where your floor is vulnerable. Your goal is not to coat the entire sheet in another layer, but to carefully apply a waterproof glue along every single cut you just made.
Choosing the Right Laminate-Specific Seam Sealer
It is imperative to use a product specifically designed for this purpose. Do not reach for a generic silicone caulk or wood glue. A proper laminate seam sealer is a specialized chemical compound with several key properties:
- Solvent-Based: These sealers are often solvent-based, which allows them to slightly “melt” the resins in the HDF core at the seam, creating a powerful, welded bond rather than just sitting on top.
- Flexibility: The product remains permanently flexible after curing. Floors naturally expand and contract with changes in temperature and humidity. A rigid sealant would crack and fail. A flexible one moves with the floor, maintaining the integrity of the seal.
- Non-Water-Based: The sealer itself should not be water-based, as that would introduce moisture into the very place you are trying to protect.
- Clear and Non-Staining: When the excess is wiped away, it should leave no residue or discoloration on the surface of the planks.
These products are typically sold in small squeeze tubes, allowing for a very precise application.
A Meticulous Guide to Sealing Laminate Seams
This is a task that rewards patience and precision. Rushing the job will lead to a messy appearance and an ineffective seal.
1. Preparation is Paramount:
- Tools and Materials: You will need your chosen laminate seam sealer, several clean microfiber cloths, a plastic putty knife or a small plastic scraper, and mineral spirits for cleanup (check the sealer’s instructions).
- Clean the Floor: The floor must be impeccably clean. Vacuum all dust and debris, then clean the floor with a manufacturer-approved, pH-neutral laminate cleaner. Pay special attention to the seams, ensuring they are free of any dirt or grit. Any debris left in the joint will compromise the seal.
- Work in Small Sections: Plan to work in a manageable area, perhaps 3 feet by 3 feet (or about 1 square meter) at a time. This ensures you can apply the sealer and clean up the excess before it begins to set.
2. The Application Process:
- Apply a Fine Bead: Hold the nozzle of the sealer tube directly over the seam. Apply a very thin, continuous bead of sealer directly into the joint. The goal is to fill the gap, not to slather the product on top of the planks.
- Connect the Planks: Immediately after applying the sealer along the seam of one plank, click the next plank into place. The click-lock mechanism will press the two edges together, distributing the sealer throughout the joint and forcing a small amount of excess up onto the surface. This is a good sign; it means the joint is full.
- For Existing Floors: If you are applying sealer to an already-installed floor, the process is slightly different. You will apply the bead into the seam and use a small, flexible plastic card (like a credit card) to gently press the sealer down into the gap.
3. Removing the Excess – The Critical Step:
- Immediate Cleanup: This is the most important part for a clean, professional look. As soon as the planks are joined (or you have worked the sealer into the seam), you must remove the excess from the surface. Do not let it dry.
- Use a Plastic Scraper: Gently drag a plastic putty knife or scraper along the seam to scoop up the majority of the squeezed-out sealant.
- Wipe with a Clean Cloth: Immediately follow up with a clean, dry microfiber cloth to wipe away any remaining film. You may need to turn the cloth frequently.
- Final Clean with Mineral Spirits: Lightly dampen another clean cloth with mineral spirits (or the recommended solvent) and give the seam one final wipe. This will dissolve any lingering residue and leave the original factory finish perfectly clean.
4. Curing Time:
- Allow the sealer to cure fully according to the manufacturer’s instructions. This can range from a few hours to a full day. During this time, avoid walking on the floor or exposing it to any moisture.
By following this method, you have effectively waterproofed the floor’s weakest link. You have not altered its appearance or violated its fundamental design. You have simply reinforced it where it needs it most.
Method 2: The Unseen Guardian Below – Mastering Underlayment and Vapor Barriers
Our focus so far has been on protecting the floor from spills from above. But what about threats from below? This is a consideration that is often overlooked until it is too late. Moisture does not just come from spilled drinks; it can also rise from the subfloor itself, especially from concrete slabs. This slow, persistent moisture vapor can be even more destructive than a sudden spill because it is a constant attack on the HDF core of your laminate. This brings us to our second proven method: creating a defensive foundation with the right underlayment and vapor barrier.
Proper floor preparation is not just a preliminary step; it is an integral part of the flooring system’s long-term health (Aqviz Author Team, 2025). This is particularly true when installing over concrete, which is porous and can transmit ground moisture. As experts at Titan Floors note, skipping a moisture barrier over concrete is a risk not worth taking.
The Role of the Subfloor in Laminate Longevity
The type of subfloor you have dictates your strategy.
- Concrete Slabs: Common in basements, garages, and ground-floor construction in many parts of the world. Concrete is like a hard sponge; it can hold and transmit a significant amount of moisture. A vapor barrier is non-negotiable here.
- Wood Subfloors (Plywood or OSB): Generally less prone to moisture transmission than concrete, especially on upper floors. However, in damp climates or over unconditioned crawl spaces, they can still be a source of moisture. A vapor barrier is still a wise investment.
- Existing Flooring: Installing laminate over old vinyl or tile can be done, but you must ensure the existing floor is level, secure, and you must still consider the original subfloor beneath it.
The goal is to isolate your new laminate floor from any potential moisture source below it. You are creating a dry, stable environment for the HDF core to live in.
Selecting the Optimal Underlayment with a Vapor Barrier
Underlayment serves several functions: it provides a bit of cushioning, it helps to deaden sound, and it can smooth over very minor subfloor imperfections. For our purposes, its most vital role is moisture protection. Many modern underlayments simplify the process by combining these features.
| Underlayment Type | Description | Best For | Moisture Protection |
|---|---|---|---|
| Standard Foam | A basic, thin polyethylene foam roll. Very inexpensive. | Budget projects over a wood subfloor on an upper level. | Minimal. Requires a separate vapor barrier film. |
| Combo Underlayment | Foam underlayment with a plastic vapor barrier film already attached. | Most DIY installations over wood or concrete. | Good. The pre-attached film simplifies installation. |
| Felt Underlayment | Dense, recycled fibers. Excellent for sound deadening and insulation. | Condos, upper floors, cold climates. | Often requires a separate vapor barrier. Some premium versions have one integrated. |
| Cork Underlayment | Natural, antimicrobial, and excellent for sound insulation and comfort. | High-end installations, sound-sensitive areas. | Good moisture resistance, but a separate vapor barrier is still recommended over concrete. |
For the ultimate protection, especially over a concrete subfloor, the best practice is to use a dedicated vapor barrier film first, and then lay your chosen underlayment on top of it. A common choice for a vapor barrier is a 6-mil polyethylene sheet. This creates a truly impervious layer. However, for most residential applications above grade, a good quality combo underlayment is sufficient.
Installation Best Practices for a Watertight Foundation
Installing the underlayment and vapor barrier correctly is just as important as choosing the right material.
- Prepare the Subfloor: The subfloor must be clean, flat, and dry. Scrape up any old paint or drywall compound. Fill any cracks or low spots with a leveling compound, as recommended for luxury vinyl tile preparation which shares similar principles with laminate (Titan Floors, 2025).
- Lay the Vapor Barrier: If using a separate barrier, roll it out across the entire subfloor. Overlap the seams by at least 8 inches (20 cm) and run the film a few inches up the walls.
- Tape the Seams: This is a step many people skip, but it is vital. Use a moisture-resistant tape (often sold alongside the barrier) to seal all the seams where the sheets overlap. This creates a single, monolithic barrier against vapor.
- Lay the Underlayment: Roll out your underlayment on top of the vapor barrier. Most underlayments should be butted up against each other at the seams, not overlapped. They often come with an adhesive strip to seal these butt joints. Follow the manufacturer’s specific instructions.
- Install the Flooring: Once your protective foundation is in place, you can begin installing your laminate planks on top. The baseboards and quarter-round molding will later cover the edges of the underlayment that run up the walls.
By building this defense from the ground up, you are ensuring that the only moisture your floor has to contend with is from above, which you have already addressed by sealing the seams. You have created a complete, 360-degree protection system.
Method 3: The Art of Proactive Care and Strategic Repair
The first two methods focused on construction and installation—sealing the joints and building a barrier. Our third method is about how you live with your floor day-to-day. It is a philosophy of care, a proactive approach that prevents damage before it happens and addresses minor issues before they become major problems. This is perhaps the most empowering method, as it puts control directly in your hands. It is the ongoing process of “resealing” your floor against the threats of daily life through mindful maintenance.
The Philosophy of Preventative Maintenance
Think of your laminate floor’s wear layer like the enamel on your teeth. It is incredibly hard and durable, but it is not invincible. You do not wait until you have a cavity to start brushing; you brush every day to prevent one. Similarly, you should not wait for water damage or deep scratches to think about your floor’s health.
The core principle is simple: keep the floor dry and clean. This single habit will prevent 90% of all potential issues.
- Entrance Mats: Place high-quality mats both outside and inside every exterior door. This traps the vast majority of dirt, grit, and moisture before it ever touches the laminate. Grit is a primary enemy, as it acts like sandpaper underfoot, dulling the finish over time.
- Immediate Spill Cleanup: This is the golden rule. Do not let spills sit. Water, juice, wine, pet urine—blot them up immediately with a dry cloth or paper towel. Because you have sealed the seams (Method 1), you have a grace period, but the sooner the liquid is gone, the better.
- Furniture Pads: Place felt pads under the legs of all furniture, especially chairs and tables that are moved frequently. This prevents scratches far more effectively than any sealant ever could.
- Avoid Steam Mops: The combination of high heat and moisture from a steam mop can force water into the seams, damage the adhesive that bonds the layers, and cause the edges of the planks to warp. It is one of the fastest ways to ruin a laminate floor.
Advanced Cleaning Techniques: Beyond the Mop
Cleaning a laminate floor correctly is a form of preservation.
- The Right Tools: A soft-bristle broom or a vacuum with a hard floor setting (ensure the beater bar is turned off) is ideal for daily dust and debris removal. For mopping, a microfiber flat-head mop is your best friend.
- The Right Cleaner: Never use soap, oil-based detergents, wax, or harsh chemicals like bleach or ammonia. These can damage the wear layer and leave a dulling, sticky residue. Use either plain water (very sparingly) or, for better results, a commercially available pH-neutral laminate floor cleaner.
- The “Damp Mop” Method: This is key. Your mop should be damp, not wet. After dipping the microfiber pad in your cleaning solution, wring it out until it is almost dry to the touch. The goal is to have enough moisture to clean the surface but so little that it evaporates within a minute or two. If you see standing water or puddles after you mop, it is too wet.
Repairing Scratches and Minor Damage
Despite your best efforts, accidents happen. A dropped tool or a dragged piece of furniture might cause a scratch or a small gouge. The instinct might be to think, “I need to reseal this spot.” But again, we must apply a more precise solution.
- For Light Scratches: Sometimes, very fine surface scuffs can be buffed out with a clean, dry microfiber cloth. If this doesn’t work, a touch-up marker designed for laminate floors can often conceal the scratch completely.
- For Deeper Scratches or Small Chips: This is where a laminate floor repair kit comes in. These kits typically contain several blocks of colored wax or putty and a small heating tool. You melt small amounts of the different colored waxes and blend them together to perfectly match the color and grain of your specific floor. You then fill the scratch or chip with the melted wax, let it harden, and scrape away the excess. The result is an almost invisible repair that fills the gouge and restores the protective surface in that one tiny spot. It is a surgical repair, not a full-body cast.
The Art of Plank Replacement: A Surgical Approach
What if the damage is too severe for a repair kit? A deep gouge, a burn mark, or significant water damage to a single plank does not mean the entire floor is lost. One of the great advantages of a floating floor system is the ability to replace individual planks. While more involved than using a wax pencil, it is a far better solution than attempting to cover the damage with a sealant.
This process requires some skill and courage, but it is very manageable for a patient DIYer. You will need a circular saw with a fine-toothed blade, a sharp chisel, a drill, a hammer, and a new plank. The basic process involves carefully cutting out the center of the damaged plank, breaking away the remaining edges, and then preparing a new plank to fit into the space. The new plank’s tongue or groove on one side is typically trimmed off so it can be lowered into place, and it is secured with a bit of wood glue on the joints.
This targeted replacement restores the floor to its original condition without affecting the surrounding area. It embraces the modular nature of the product, a feature you lose the moment you coat the entire surface in a monolithic layer of polyurethane.
The Inevitable Consequences: Why Attempts to Reseal Laminate Flooring Fail
We have alluded to the negative outcomes of attempting to reseal laminate, but it is worth examining them in greater detail. Understanding the failure modes can strengthen our resolve to choose the correct methods. The desire to apply a top-coat often comes from a history of working with solid wood flooring, where sanding and refinishing is a standard and effective procedure. The error is one of category confusion; laminate is a different phylum of flooring altogether.
Polyurethane and Varnish: A Recipe for Disaster
Polyurethane, varnish, and acrylic floor polishes are all film-forming sealants. They are designed to cure into a solid, continuous sheet. As established, they do not bond to the non-porous aluminum oxide wear layer. The initial result might be a deceptive, high-gloss shine. However, the floor is a dynamic entity. It experiences foot traffic, which causes abrasion. It experiences temperature and humidity shifts, which cause microscopic expansion and contraction of the planks.
Because the polyurethane film is not truly bonded to the planks, these forces quickly lead to failure.
- Peeling and Flaking: The sealant film will start to lift, often beginning at the seams or in high-traffic areas. It will look like a terrible sunburn peeling away from the floor.
- Clouding: Moisture can become trapped between the polyurethane film and the original wear layer, leading to a hazy, cloudy appearance that cannot be cleaned away.
- Scuffing and Stickiness: These aftermarket finishes are almost never as hard as the factory wear layer. They will scuff and scratch more easily, and they often develop a sticky texture that attracts and holds dirt, making the floor a nightmare to keep clean.
At this point, the homeowner is faced with a catastrophic problem. The only way to remove the failed polyurethane is with harsh chemical strippers, which themselves carry a high risk of permanently damaging the laminate’s wear layer and seeping into the seams to destroy the core. It is a classic case of the “cure” being infinitely worse than the disease.
“Floor Polish” vs. “Sealant”: A Critical Distinction
It is important to differentiate between a “sealant” and a “polish” or “refresher” designed specifically for laminate floors. While we advise against most aftermarket coatings, some reputable manufacturers offer products labeled as a “polish” or “refresher.” These are not sealants. They are typically water-based acrylic solutions that apply an incredibly thin, non-permanent coating designed to fill in micro-scratches and temporarily even out the sheen.
Think of it as a temporary cosmetic treatment, not a permanent structural change. It can be useful for reviving a dull-looking floor before a special event, for example. However, these polishes must be used with caution. They must be applied in very thin coats, and they can build up over time, leading to a cloudy appearance. They also need to be periodically stripped off with a special remover, which adds to the maintenance burden. While less destructive than polyurethane, they are not a substitute for the proper care and repair methods outlined earlier. For most situations, a simple, thorough cleaning is the better and safer way to restore a floor’s appearance.
The Modern Alternative: Embracing Truly Waterproof Laminate Flooring
So far, our discussion has focused on protecting traditional, water-resistant laminate. But what if there were a way to eliminate the core vulnerability—the moisture-sensitive HDF core—altogether? In the last several years, flooring technology has made a significant leap forward, leading to the creation of truly waterproof laminate flooring. For anyone considering a new floor for a kitchen, bathroom, basement, or any area with high moisture, this modern material represents the ultimate solution.
This is where understanding the products offered by a leading manufacturer can be enlightening. Exploring options like high-quality waterproof laminate flooring reveals a fundamental shift in material science. These are not your parents’ laminate floors.
The Evolution of Laminate: From Water-Resistant to Waterproof
The key innovation lies in the core. Instead of a wood-based HDF core, the newest generation of waterproof laminate often utilizes a stone-plastic composite (SPC) or wood-plastic composite (WPC) core. These materials are inherently impervious to water. You could submerge a plank with an SPC core in water for weeks, and it would not swell, warp, or deform.
This eliminates the primary failure mode of traditional laminate. The concern about water seeping into the seams and swelling the core becomes moot because the core itself is waterproof. This technology effectively combines the scratch-resistance and realistic appearance of laminate with the waterproof properties of luxury vinyl tile.
Completing the System: Perimeters and Accessories
A truly waterproof system goes beyond just the planks. It requires attention to the entire installation, particularly the perimeter. Water can still get under a floor from the edges. This is where components like waterproof vinyl base boards become integral. Using a waterproof baseboard or quarter-round molding and sealing the gap between the molding and the floor with a flexible, waterproof silicone caulk creates a complete, bathtub-like seal around the room.
Furthermore, a company with deep experience, like a laminate flooring manufacturer in China with over 20 years of experience, understands the importance of a complete system, offering everything from the planks themselves to matching transition strips and tool accessories. This holistic approach ensures every component is designed to work together to create a durable, waterproof installation.
A Cost-Benefit Analysis: Repairing vs. Upgrading
This brings us to a practical decision point. If you have an older, non-waterproof laminate floor that is showing signs of water damage, you are faced with a choice. You can invest time and effort into the methods we have discussed: meticulously sealing seams, performing surgical plank replacements, and committing to a rigorous maintenance schedule. For minor issues or floors in dry areas, this is an excellent and cost-effective strategy.
However, if the floor is in a high-moisture area and the damage is widespread, the more sensible long-term investment is often to replace it with a modern waterproof laminate product. The upfront cost will be higher than a simple repair, but the peace of mind and dramatically lower risk of future water damage provide significant value. You are not just buying a new floor; you are buying an end to the constant worry about spills, moisture, and swelling. It is a move from a defensive, damage-control posture to one of confident, low-maintenance enjoyment of your space.
Frequently Asked Questions (FAQ)
Can I put polyurethane on my laminate floor to make it waterproof?
No. You should never apply polyurethane or a similar top-coat sealant to a laminate floor. The factory wear layer is non-porous, and the polyurethane will not bond correctly. It will inevitably peel, flake, and cloud, ruining the floor’s appearance and voiding the warranty.
What is the difference between a floor polish and a floor sealant?
A sealant, like polyurethane, is intended to be a permanent, protective coating. A laminate-specific polish or refresher is a temporary, thin, water-based acrylic coating designed to fill in micro-scratches and even out the sheen. Polishes can be useful for a temporary refresh but can build up over time and require stripping.
My laminate floor is dull. How can I make it shine without sealing it?
First, ensure it is thoroughly clean. A buildup of residue from improper cleaners is the most common cause of dullness. Clean the floor with a pH-neutral laminate cleaner and a microfiber mop. If it remains dull, you can consider a laminate-specific polish, but use it sparingly and understand it’s a temporary cosmetic fix.
Is there a way to fix scratches on laminate flooring?
Yes. Minor scratches can be addressed with a laminate repair kit. These kits use colored wax or putty fillers that you blend to match your floor’s color. You fill the scratch, let it harden, and scrape it level, providing a durable and virtually invisible repair for a specific spot.
How can I protect my laminate floor from my pet’s water bowl?
This is a classic high-risk area. The best solution is a multi-pronged defense. First, use a laminate seam sealer on the joints in the area around the bowl. Second, place a waterproof mat with a raised lip under the bowls. This contains any splashes and provides a robust barrier.
Is “water-resistant” laminate the same as “waterproof” laminate?
No, they are different. “Water-resistant” typically refers to traditional laminate with an HDF core that can withstand topical spills for a certain period before damage occurs. “Waterproof” laminate usually features a composite core (like SPC) that will not swell or degrade even with prolonged water exposure, making it a superior choice for wet areas.
If I can’t reseal my laminate floor, what is the single best thing I can do to protect it?
The single most effective action is to manage liquids. Wipe up every spill, no matter how small, immediately. Do not let any liquid sit on the floor for more than a few moments. This simple habit prevents water from ever having the chance to penetrate the seams and cause damage.
A Final Reflection on Preservation
The journey to understand how to best care for laminate flooring leads us to a conclusion that is both simple and profound. The impulse to “reseal” is a desire to impose a solution from one domain—wood finishing—onto another where it does not belong. True mastery of laminate care lies not in adding another layer, but in understanding and respecting the layers that are already there. It is about working with the material’s strengths and protecting its engineered weaknesses.
By focusing your efforts on the vulnerable seams, building a proper foundation with a vapor barrier, and adopting a mindful practice of daily care and precise repair, you are engaging in a far more effective form of preservation. You are not fighting the nature of your floor; you are becoming its ally. This approach not only ensures a longer life for your current floor but also equips you with the wisdom to make better choices for future flooring projects, perhaps leading you to the robust and worry-free world of modern waterproof materials. The goal, after all, is not just to have a floor, but to have a beautiful, durable surface that provides a foundation for your life, free from the constant worry of damage.
References
Aqviz Author Team. (2025, August 13). Bathroom waterproofing: Everything you should know. Aqviz. https://aqviz.com/bathroom/waterproofing/
Beflooring. (n.d.). Laminate flooring. https://beflooring.com/laminate-flooring-c.html
CFD. (2024, February 29). Ultimate checklist for best flooring for concrete slabs with moisture. California Flooring and Design. https://www.cafloordesign.com/2024/02/29/best-flooring-for-concrete-slab-with-moisture/
E., Al Rye. (2025, January 14). How to make LVT waterproof: Luxury vinyl tile floor DIY guide. Titan Floors. https://titanfloors.ca/how-to-make-lvt-waterproof/
Kahn, M. (2025, April 18). The complete guide to luxury vinyl flooring in 2025. Pro Flooring Installers. https://www.proflooringinstallers.com/luxury-vinyl-flooring-guide/