 +86 17753100577
 manager@beflooring.com


Expert Answer: Can Brown Laminate Flooring Be Stained Black? 3 Proven Alternatives for 2025
noviembre 3, 2025
Abstract
An inquiry into the feasibility of altering the color of existing laminate flooring, specifically changing brown laminate to black, reveals a fundamental material limitation. Laminate flooring is a synthetic, multi-layered product, crowned with a non-porous, transparent wear layer made of materials like aluminum oxide. This layer, designed for durability and resistance to abrasion and moisture, is impervious to traditional wood stains, which function by penetrating a material’s pores. Consequently, any attempt to stain laminate flooring is destined to fail, as the pigment has no medium for absorption and will simply wipe away. This analysis explores the material science behind this incompatibility, detailing the composition of laminate planks. It then pivots to examine three viable alternatives for achieving a black floor finish: painting the surface with specialized high-adhesion primers and paints, applying peel-and-stick vinyl coverings, and the complete replacement of the old flooring with new, factory-finished black laminate. Each alternative is evaluated based on durability, cost, labor, and aesthetic outcome, concluding that replacement offers the most durable and aesthetically superior long-term solution.
Principales conclusiones
- Staining laminate is fundamentally impossible due to its non-porous plastic wear layer.
- Painting with a high-adhesion primer and floor enamel is a temporary color-change option.
- Understanding why you can’t stain brown laminate flooring black is key to choosing the right alternative.
- Peel-and-stick vinyl planks offer a simple, reversible way to cover existing laminate.
- Replacing old planks with new black laminate is the most durable and professional solution.
- Proper surface preparation, including cleaning and light sanding, is vital for any painting project.
- Consider new high-quality waterproof laminate flooring for a lasting and worry-free black finish.
Índice
- Understanding Laminate Flooring: Why Staining Is Impossible
- Alternative 1: Painting Your Laminate Floor Black
- Alternative 2: Using Peel-and-Stick Coverings for a Reversible Change
- Alternative 3: Replacement as the Definitive Solution
- Frequently Asked Questions (FAQ)
- Conclusión
- Referencias
Understanding Laminate Flooring: Why Staining Is Impossible
The desire to transform one’s living space is a deeply human one. A simple change in color can shift the entire emotional tenor of a room. You might look at your brown laminate floors, once a practical and pleasing choice, and now envision a sleek, dramatic black. The immediate, seemingly logical thought is to stain it, just as one would with a piece of wood furniture. This line of reasoning, however, encounters a wall—not of opinion, but of material science. The question, “can brown laminate flooring be stained black?” leads us down a path of understanding the very nature of the material beneath our feet. The answer is an unequivocal no, and to comprehend why, we must perform a small deconstruction, examining the anatomy of a laminate plank.
The Anatomy of a Laminate Plank: A Multi-Layer System
Unlike solid hardwood, which is a homogenous piece of wood from top to bottom, laminate flooring is a composite, an assembly of different layers fused together under high heat and pressure. Each layer serves a distinct and vital purpose, contributing to the plank’s overall performance and appearance. According to flooring experts, a typical laminate plank consists of four primary layers (Banks, 2022).
- The Backing Layer: This is the foundation of the plank, providing stability and moisture resistance from below. It braces the plank, preventing it from warping or bowing.
- The Core Layer: This is the thickest and most substantial part of the plank, typically made of high-density fiberboard (HDF). The HDF core gives the plank its rigidity and impact resistance. It is also where the locking mechanism is milled, allowing the planks to click together during installation.
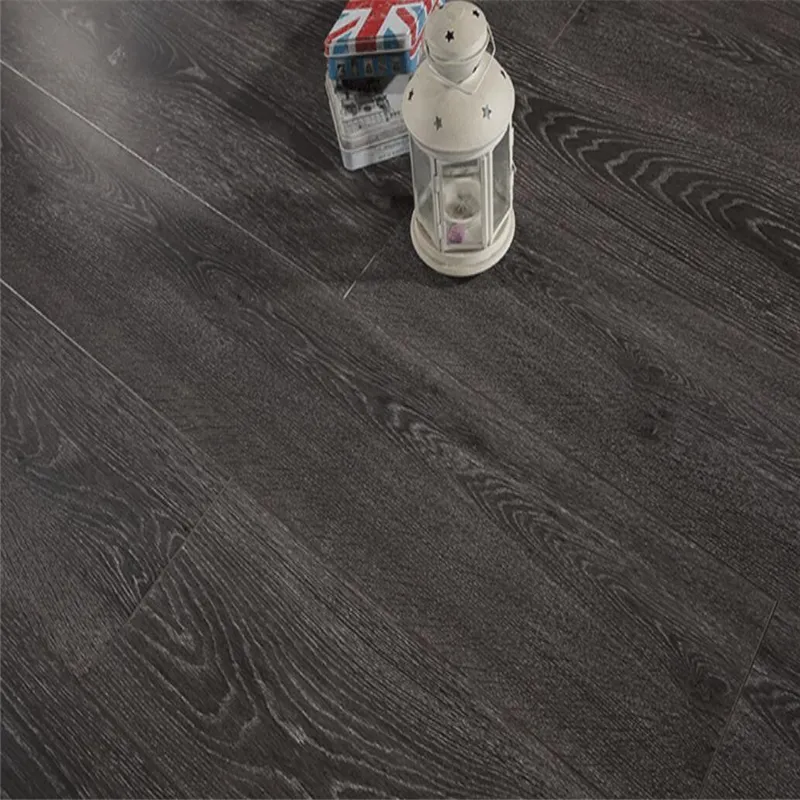
- The Decor Layer: This is the layer you see. It is, in essence, a highly detailed photograph of a material, most often wood, but it can also be stone or tile. This photographic paper is what gives the floor its color and pattern—the “brown” in your brown laminate.
- The Wear Layer: This is the topmost, transparent layer and the primary reason staining is impossible. It is a clear, tough coating, usually infused with aluminum oxide, one of the hardest mineral compounds. Its sole job is to protect the decor layer and the core from scratches, fading, spills, and daily wear and tear.
Imagine a beautifully printed photograph. Now, imagine that photograph is sealed permanently behind a sheet of clear, hard plastic. This is the fundamental structure of a laminate floor.
The Impenetrable Wear Layer: The Scientific Barrier to Stain
Let us consider the process of staining. A stain is not a surface coating like paint. It is a pigment suspended in a solvent, designed to be absorbed into the porous structure of a material, like wood. Wood is composed of millions of microscopic pores and fibers. When you apply stain, the liquid seeps into these pores, coloring the wood from within.
The wear layer of laminate flooring is the antithesis of porous. It is a solid, non-porous plastic coating. Think of it as a sheet of glass or the surface of a melamine countertop. If you were to spill a staining liquid on it, what would happen? The liquid would bead up on the surface. There are no pores for it to penetrate. You could simply wipe it away with a cloth, leaving no trace of color behind. This is precisely what happens when one attempts to apply wood stain to laminate. The stain has nowhere to go, no fibers to cling to. It cannot and will not be absorbed.
To ask if you can stain laminate is akin to asking if you can use a wood stain to color a stainless steel appliance. The materials are fundamentally incompatible with the process. Any product marketed as a “laminate stain” is almost certainly a misnomer, referring instead to a type of surface paint or gel coat, which we will explore later.
Stain vs. Paint: A Crucial Distinction
To fully grasp the issue, we must clarify the difference between staining and painting.
| Feature | Staining | Painting |
|---|---|---|
| Mechanism | Absorption | Adhesion |
| How it Works | Pigment soaks into the material’s pores, coloring it from within. | A film of pigment and binders sits on top of the surface. |
| Superficie | Requires a porous surface (e.g., unfinished wood, concrete). | Can be applied to non-porous surfaces with proper priming. |
| Appearance | Enhances the natural grain and texture of the material. | Covers the original surface and texture completely. |
| Durabilidad | Becomes part of the material; does not chip or peel. | Can chip, scratch, or peel if the bond to the surface fails. |
This distinction is not merely semantic; it is the core of our problem. The process of staining relies on a property—porosity—that laminate flooring is specifically engineered to lack. Painting, on the other hand, relies on adhesion. It is a process of getting one material to stick to another. While challenging on a slick surface like a laminate wear layer, it is, at least, theoretically possible.
The Illusion of Wood: The Photographic Decor Layer
Even if one could magically penetrate the wear layer, what would be underneath? Not wood, but a piece of paper. The decor layer is a high-resolution image. Attempting to stain a photograph would result in a blurry, ruined mess. If you were to aggressively sand the floor to remove the wear layer, you would not reveal a layer of stainable wood. You would grind away the photograph, exposing the light-brown, sawdust-like HDF core beneath. This would irreversibly destroy the floor, leaving you with a far greater problem than an unfashionable color.
The conclusion is inescapable. The very qualities that make laminate flooring a durable, low-maintenance, and popular choice—its layered construction and protective wear layer—are the same qualities that make staining it an impossibility. So, what is one to do when faced with a sea of brown laminate that no longer sparks joy? We must abandon the idea of staining and turn our minds to the realm of alternatives.
Alternative 1: Painting Your Laminate Floor Black
Since we have established that staining is off the table, the first and most direct alternative to consider is painting. This is a project that requires a deep commitment to process and a realistic management of expectations. It is not a simple weekend task, and any shortcuts will almost certainly lead to failure—peeling, bubbling, and a finish that looks worse than the original. However, if executed with patience and the correct materials, it can provide a dramatic and cost-effective transformation.
The Philosophical Question: Should You Paint Your Floor?
Before we discuss the “how,” we must contemplate the “should.” Painting your laminate floor is an irreversible act. You are permanently covering the factory finish. Consider the trade-offs.
On one hand, painting is far less expensive and disruptive than a full replacement. For a few hundred dollars in materials, you can change your floor to any color imaginable, including a sophisticated black. It is a solution born of ingenuity and budget-consciousness.
On the other hand, a painted surface will never possess the same durability as a factory-cured aluminum oxide wear layer. It will be more susceptible to scratches from pet claws, scrapes from moving furniture, and chipping from dropped objects. It requires a significant amount of labor: thorough cleaning, sanding, priming, multiple coats of paint, and a protective topcoat. The question becomes one of value. Do you value the immediate aesthetic change and lower upfront cost more than you value long-term, carefree durability? For a low-traffic area like a guest bedroom, painting might be a perfectly reasonable choice. For a high-traffic hallway or living room, its longevity may be disappointingly short.
A Step-by-Step Guide to a High-Adhesion Finish
If you decide to proceed, success hinges entirely on meticulous preparation and the use of appropriate products. Do not simply buy a can of wall paint and expect it to work.
1. Surface Preparation: The Foundation of Success
This is the most tedious but most vital step. The goal is to create a surface that is perfectly clean and has a slight “tooth” for the primer to grip.
- Deep Clean: Begin by vacuuming the floor to remove all loose dust and debris. Then, clean it thoroughly with a solution of trisodium phosphate (TSP) substitute and water, or a specialized floor degreasing agent. This removes grease, grime, and any cleaning residues that could interfere with adhesion. Rinse the floor with clean water and allow it to dry completely, which may take up to 24 hours.
- Scuff Sanding: The glossy, slick wear layer is the enemy of adhesion. You must lightly abrade it. Use a pole sander or a random orbital sander with 120-grit or 150-grit sandpaper. The goal is not to remove the wear layer, but simply to “scuff” it, removing the sheen and creating millions of microscopic scratches. The floor should have a uniformly dull, matte appearance when you are finished.
- Final Cleaning: After sanding, there will be a fine layer of dust everywhere. Vacuum the floor meticulously, then wipe it down with a tack cloth or a damp microfiber cloth to pick up any remaining particles. Any dust left behind will become gritty bumps in your final finish.
2. The Role of Primer: Creating a Bond
Primer is the bridge between the slick laminate and the topcoat of paint. Using a standard latex primer will result in peeling. You must use a high-adhesion bonding primer specifically designed for slick, non-porous surfaces. Look for products labeled for use on tile, laminate, or glossy surfaces. Apply a thin, even coat of the primer using a high-quality roller and a brush for the edges. Let it dry and cure for the time recommended by the manufacturer, which is often longer than for standard primers.
3. Application of Paint: Technique and Tools
Once the primer is fully cured, you can apply your color. Use a high-quality acrylic latex porch and floor enamel. These paints are formulated with binders that make them more durable and resistant to the unique challenges of a floor surface.
- Apply the paint in thin, even coats. Two or even three thin coats are far superior to one thick coat, which will take longer to cure and be less durable.
- Use a high-quality roller with a short nap to avoid texture. Use a good-quality brush to “cut in” the edges of the room.
- Allow each coat to dry completely according to the manufacturer’s instructions before applying the next. Rushing this step can cause the paint to remain tacky.
4. Sealing the Deal: The Protective Topcoat
While floor enamel is durable, it benefits immensely from a protective clear coat. This is especially true for a dark color like black, which shows scratches more easily.
- Choose a water-based polyurethane or polycrylic floor finish. These products are clear, non-yellowing, and available in various sheens (matte, satin, semi-gloss).
- Apply at least two, and preferably three, thin coats of the topcoat, allowing for adequate drying time between each.
- After the final coat, the floor needs to cure. You may be able to walk on it in socks after 24 hours, but it can take several days to a week to fully harden. Avoid placing heavy furniture or rugs on it during this curing period.
Durability and Longevity: Managing Expectations
A painted laminate floor, even when done perfectly, is a high-maintenance surface. You can expect it to last between one and five years before it requires significant touch-ups or a complete re-coat, depending heavily on the level of foot traffic and care. It will be a compromise, a testament to your hard work, but it will never replicate the effortless resilience of a manufactured finish.
Alternative 2: Using Peel-and-Stick Coverings for a Reversible Change
If the labor and questionable longevity of painting give you pause, there is a second path. This alternative offers a dramatic change with significantly less effort and, crucially, it is completely reversible. We are talking about modern, high-quality peel-and-stick flooring, typically made of vinyl. This is not the flimsy, cheap-looking contact paper of decades past. The market in 2025 offers sophisticated, thick, and textured products that can convincingly mimic wood or stone.
The Appeal of Impermanence: A Renter-Friendly Solution
The primary virtue of peel-and-stick products is their non-destructive nature. They adhere to the existing floor without creating a permanent bond that would damage the laminate underneath. This makes them an ideal solution for renters who are forbidden from making permanent changes, or for homeowners who are hesitant to commit to a bold color like black. If you decide you miss your brown floors in a few years, or if you want to try a different style, you can simply peel up the vinyl.
This approach bypasses the entire problem of porosity and adhesion. You are not trying to change the laminate; you are simply covering it with a new, independent surface. It is quick, clean, and requires minimal tools. For many, this represents the perfect balance of impact and ease.
Comparing Materials: Vinyl Planks vs. Tiles
Peel-and-stick products generally come in two formats: planks (long and narrow, like wood) and tiles (square). Choosing between them is a matter of aesthetic preference and installation nuance.
| Feature | Peel-and-Stick Vinyl Planks | Peel-and-Stick Vinyl Tiles |
|---|---|---|
| Aesthetic | Effectively mimics the look of wood flooring. | Better for creating stone, slate, or geometric patterns. |
| Instalación | Laid in a staggered pattern, which can be more forgiving of slight imperfections. | Requires precise alignment to a grid; errors are more noticeable. |
| Seams | Fewer seams overall, which can lead to better water resistance. | More seams, which can potentially allow moisture to seep through over time. |
| Best Use Case | Achieving a black “wood” look with realistic texture and grain. | Creating a solid black floor or a checkerboard pattern. |
| Repair | A damaged plank can be individually heated, removed, and replaced. | A damaged tile can be individually heated, removed, and replaced. |
Installation and Removal: A Practical Overview
The installation process is refreshingly straightforward, though it still benefits from a careful approach.
- Preparation: Just as with painting, the floor must be immaculately clean. Any piece of grit or debris left on the surface will create a lump under the new vinyl. Clean and degrease the laminate thoroughly.
- Layout: Find the center of the room and snap chalk lines to create a working grid. This ensures your pattern starts straight and remains so. It is often wise to “dry fit” a few rows of planks or tiles without removing the backing paper to visualize the layout and plan your cuts for the edges of the room.
- Aplicación: Begin at your center lines and work your way out. Peel the backing paper off a plank or tile, carefully align it with your guidelines, and press it firmly into place. Many people use a small hand roller (a J-roller) to ensure a solid bond across the entire surface.
- Cutting: For pieces along the walls, measure carefully and cut the vinyl with a sharp utility knife and a straight edge. It typically only requires scoring the surface and then snapping the piece.
Removal is the reverse process. Using a hairdryer or a heat gun on a low setting to gently warm the vinyl will soften the adhesive, allowing you to peel a corner up and pull the plank or tile off the floor. Any residual adhesive can usually be cleaned up with a gentle adhesive remover.
While this solution is easier and less permanent than painting, it is not without its own considerations. The quality of the adhesive can vary between brands, and in very high-moisture environments, peeling at the edges can sometimes occur. It is also a surface layer, and while durable, a sharp object can still gouge or tear it.
Alternative 3: Replacement as the Definitive Solution
We have explored a high-effort, permanent solution (painting) and a low-effort, temporary one (peel-and-stick). Now we arrive at the third, and in many ways, the most logical and satisfying alternative: replacing the flooring altogether. This approach directly addresses the core issue by removing the unwanted material and substituting it with one that perfectly matches your aesthetic goals from the outset. It is the most involved and costly option, but it also yields the most professional, durable, and valuable result.
The Argument for Authenticity: Why Replacement Excels
To paint or cover a floor is to compromise. You are applying a cosmetic fix to a structural element. Replacing the floor, however, is a fundamental solution. The benefits are clear and compelling.
- Unmatched Durability: A new, factory-finished black laminate floor comes with the same robust aluminum oxide wear layer as your original brown floor. It is designed from its core to withstand foot traffic, spills, and scratches. Its durability is not an afterthought achieved with a topcoat; it is an integral part of its design. You can find an amazing selection of durable china laminate flooring factory options that are built to last.
- Superior Aesthetics: A manufactured black laminate offers a depth and realism that paint cannot replicate. You can choose from a variety of finishes, from matte to high-gloss, and textures that mimic wire-brushed, hand-scraped, or smooth wood grain. The color is consistent, and the bevels between the planks are clean and defined. It simply looks and feels like a premium, intentional floor.
- Increased Home Value: While a freshly painted floor might look nice, it is unlikely to be seen as a value-add by a potential homebuyer. In fact, it might be viewed as a project they will need to undo. A new, professionally installed, high-quality laminate floor, on the other hand, is a clear upgrade and can increase the perceived and actual value of your home.
- Technological Advances: The laminate flooring of 2025 is far more advanced than products from a decade or two ago. Many options now feature enhanced water resistance or are fully waterproof, making them suitable for kitchens, bathrooms, and basements. Replacing your old floor gives you an opportunity to upgrade to a technologically superior product.
Cost-Benefit Analysis: Painting vs. Replacing
To make an informed decision, it is helpful to compare the two “permanent” options directly. The following table provides a general comparison, though specific costs will vary by location and product choice.
| Factor | Painting Existing Laminate | Replacing with New Laminate |
|---|---|---|
| Upfront Material Cost | Low ($1-$2 per sq. ft. for primer, paint, sealer) | Moderate ($2-$7 per sq. ft. for planks) |
| Labor | Very High (extensive prep, multiple coats, long drying times) | Moderate to High (removal of old floor, installation of new) |
| Durabilidad | Low to Moderate (1-5 years before major touch-ups) | Very High (15-30 year warranties are common) |
| Aesthetic Result | Monochromatic, painted look. Can look DIY. | Professional, authentic wood/stone look with texture. |
| Long-Term Value | Neutral to Negative | Positive |
| Mantenimiento | Requires careful cleaning and frequent touch-ups. | Standard, low-effort laminate cleaning. |
When you analyze the trade-offs, the argument for replacement becomes very strong, especially for a primary living area. The higher initial investment buys you decades of durability, minimal maintenance, and a superior aesthetic. The seemingly lower cost of painting is paid for with your own intensive labor and the knowledge that the finish is fragile and temporary.
The Installation Process: A Path to a New Floor
Replacing a laminate floor is a significant project but is well within the capabilities of a competent DIYer. The process involves:
- Removal: Carefully remove any baseboards or shoe molding. Then, starting at one wall, pry up the first row of old laminate planks. Since they are a floating floor, the rest should come up relatively easily.
- Subfloor Preparation: Once the old floor is removed, inspect and prepare the subfloor. It must be clean, flat, and dry.
- Underlayment: Roll out a new underlayment, which provides cushioning, sound absorption, and a moisture barrier.
- Installation: Begin laying the new black laminate planks according to the manufacturer’s instructions, typically using a click-lock system. This process requires precision and the right tools, so having the proper floor tool accessories like a tapping block and pull bar is essential for a tight, professional fit.
- Finishing: Reinstall the baseboards and any necessary transitions to other flooring types.
This path, while the most arduous, is also the most rewarding. It definitively resolves the question of how to get a black floor, not by asking “can brown laminate flooring be stained black,” but by providing a beautiful, durable, and authentic black laminate floor.
Frequently Asked Questions (FAQ)
1. Can you use a gel stain on laminate flooring to change its color? No. Gel stain, while thicker than traditional stain, is still a stain. It is designed to sit on the surface of a material like fiberglass or already-finished wood and create a new color layer. However, it still requires some minimal absorption and surface profile to adhere properly. The perfectly smooth, non-porous wear layer of laminate flooring offers no grip for the gel stain, and it will easily scratch or wipe off.
2. Will aggressively sanding my laminate floor help it absorb stain? No, this will destroy your floor. The “wood” look of laminate is just a photograph. The layer above it is a clear plastic wear layer. If you sand aggressively enough to remove the wear layer, you will sand right through the thin photographic paper, exposing the light-brown HDF (high-density fiberboard) core. You will be left with a permanently damaged, unsightly patch that cannot be repaired.
3. How long does painted laminate flooring actually last? The lifespan of a painted laminate floor depends heavily on the quality of the preparation and the amount of foot traffic it receives. In a low-traffic area like a guest room, a well-executed paint job might look good for 3-5 years. In a high-traffic hallway or a home with pets and children, you may see scratches and chips within the first year, requiring frequent touch-ups.
4. What is the best type of paint to use on a laminate floor? The system is more important than any single can of paint. You must use a high-adhesion bonding primer designed for slick surfaces first. After that, the best topcoat is a durable acrylic porch and floor enamel. Finally, protect the paint with at least two coats of a water-based polyurethane floor finish. Skipping any of these steps will compromise the durability of the finish.
5. Is it a good idea to paint laminate floors in a kitchen or bathroom? It is generally not recommended. While floor enamels and polyurethane topcoats are water-resistant, the constant high humidity and potential for standing water in kitchens and bathrooms can cause the paint to fail prematurely. Water can work its way into any small scratch or imperfection, getting under the paint film and causing it to lift and peel. For such areas, replacing the floor with a product like high-quality waterproof laminate or luxury vinyl plank is a much safer investment.
Conclusión
The journey that begins with the simple question, “can brown laminate flooring be stained black?” concludes with a clear and definitive answer grounded in material science: no. The inherent nature of laminate flooring, with its impenetrable wear layer protecting a photographic image, renders it incompatible with any product that relies on absorption. The desire for a black floor, however, is not a dead end. It simply requires a pivot in strategy.
One can choose the path of transformation through painting, a labor-intensive process that offers a dramatic change for a low material cost, albeit with a significant compromise in long-term durability. Alternatively, one can opt for the clever and reversible solution of peel-and-stick vinyl, covering the old floor with a new, temporary surface.
Ultimately, the most robust, valuable, and aesthetically pleasing solution is replacement. By removing the old brown laminate and installing new, factory-finished black planks, you achieve your desired look without compromise. You gain a floor that is not only beautiful but also engineered for decades of performance, benefiting from the latest advancements in flooring technology. The decision rests on a personal calculation of cost, effort, and desired longevity, but the knowledge of what is possible, and what is not, empowers you to make the best choice for your home.
Referencias
Banks, R. (2022, December 13). The ultimate guide for laminate flooring. Word of Mouth Floors. wordofmouthfloors.com
BEFlooring. (2025, October 28). Laminate flooring vs vinyl: A practical 2025 buyer’s guide to 7 key differences. beflooring.com
Hessler Floor Covering. (2024, December 27). An in-depth look at laminate flooring: Benefits, styles, and maintenance.
The Tile Shop. (2025, May 15). Laminate flooring buying guide. tileshop.com
Wikimedia Foundation. (2025, August 6). Laminate flooring. Wikipedia.
Ziering, S. (2025, April 25). Laminate flooring: An in-depth look. Proximity Mills. proximitymillsflooring.com